Red Light on Motherboard: Reasons & Fixes
When you power on your computer and see a red light on the motherboard, it’s a clear signal that something isn’t right. This could indicate a problem with the internal parts of your PC. Before we determine the cause of the red light and take appropriate action to resolve it, let’s first understand the red light’s purpose.
Understanding the Red Light on Your Motherboard
The red light, often referred to as a debug LED, indicates a problem during the Power-on Self-Test (POST). This is your motherboard’s way of telling you there’s an issue preventing your computer from booting up properly. Let’s decode what each LED represents:
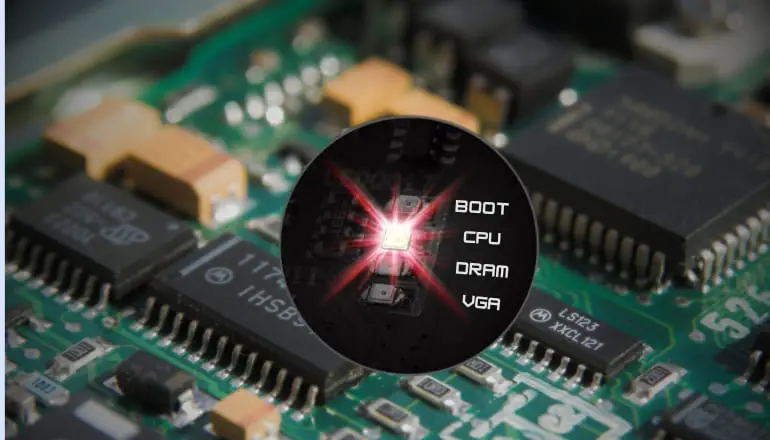
- BOOT: Indicates the status of your main storage device. If lit, your motherboard is having trouble recognizing the main storage device. This could mean your SSD or HDD isn’t connected properly or is failing.
- CPU: Signals CPU-related issues, such as improper installation or defective pins.
- DRAM: Points to RAM problems, like faulty modules or incorrect installation.
- VGA: Indicates your motherboard isn’t detecting your graphics card correctly. This could be due to an incorrect installation or a faulty card.
For more detailed troubleshooting on DRAM Light, check out the specific post we published on it.
Causes of Red Light on Motherboard
CPU Red Light
When the CPU red light is on, it’s often a sign of a hardware failure. This could be due to an incorrect CPU installation, where the processor isn’t seated correctly in its socket. Another common issue is defective CPU pins, which can bend or break during installation. If the CPU fan isn’t plugged in or functioning properly, the system can overheat, causing the red light to appear.
Fixes:
- Start by removing and reinstalling the CPU, ensuring it’s correctly aligned.
- Check the pins for any signs of damage and replace the fan if it’s not spinning.
RAM Red Light
A red light on the DRAM LED usually means your motherboard is having trouble with your RAM. This could be due to incorrect RAM installation, faulty RAM modules, or the RAM not being seated properly.
Fixes:
- Power down your system and reseat the RAM sticks, ensuring they snap into place firmly.
- If the problem persists, test each RAM module individually by placing them in different slots.
- If you identify a bad module, replace it.
- Sometimes, adjusting the BIOS settings or disabling XMP profiles can resolve compatibility issues.
- Regularly clean the RAM slots with compressed air to prevent dust-related problems.
Graphics Card Red Light
The VGA red light indicates a problem with your graphics card. This could be due to incorrect graphics card installation, a faulty card, or the card not being detected by the system.
Fixes:
- Reseat the card, ensuring it’s properly inserted into its PCIe slot.
- Check the power connectors and make sure they are securely attached.
- If you have another graphics card, try swapping it out to see if the issue persists.
- Sometimes, updating the graphics card drivers or BIOS can resolve detection issues.
Faulty Power Supply
A faulty power supply can cause a myriad of issues, including a red light on the motherboard. Symptoms include overheating, PSU failure, or insufficient power delivery to the components.
Fixes:
- Check the PSU connections, ensuring all cables are securely attached.
- Use a multimeter to test the voltage outputs; they should match the specifications listed in the manual.
- If the PSU is overheating, improve airflow within the case or upgrade to a more efficient model.
- If the PSU is failing, it may need to be replaced. Always opt for a reputable brand with good reviews to ensure reliability.
Power Button Issues
Sometimes, the issue isn’t with the components but with the power button itself. A faulty power button can prevent your system from booting, causing the motherboard to display a red light.
Fixes:
- Check the power button connections on the motherboard, ensuring they are properly seated.
- Try shorting the power switch pins on the motherboard with a screwdriver to see if the system powers on. If it does, the issue is with the power button or its wiring.
- Replacing the power button or the case can resolve this problem.
Other Causes
Overheating
Overheating is a common cause of motherboard issues. This can affect the CPU, GPU, or the system as a whole. If your system is overheating, ensure all fans are working correctly and that there’s adequate airflow. Clean dust from heatsinks and fans, and consider reapplying thermal paste to the CPU and GPU.
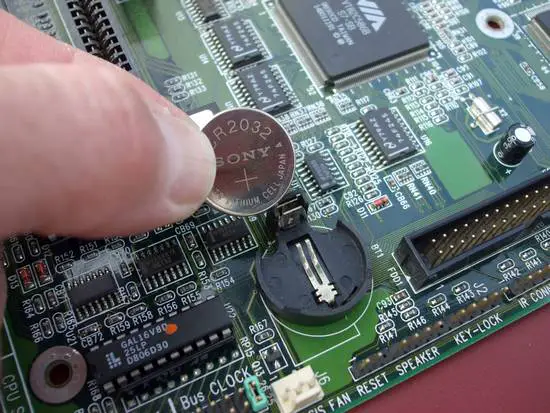
CMOS Battery Issues
A dead or faulty CMOS battery can cause boot errors and other issues. The CMOS battery maintains your BIOS settings when the system is powered off. If it’s dead, your settings may reset, causing the red light to appear. Replace the CMOS battery with a new one, ensuring it’s properly seated.
For more details, visit CMOS Battery Replacement Guide.
Boot Errors
Boot errors can occur when the boot device isn’t recognized or fails. Check the connections to your storage devices and ensure they are properly connected. Sometimes, simply reordering the boot sequence in the BIOS can resolve the issue.
Good to Note: Ensure all cables inside your case are securely connected. Check for any loose components, paying particular attention to the CPU, RAM, and graphics card. Sometimes, a cable can come loose during transport or installation, causing issues.
Advanced Troubleshooting
Update Your BIOS
Updating your BIOS can resolve compatibility issues and bugs that may be causing the red light. Check your motherboard manufacturer’s website for the latest BIOS update. Follow the instructions carefully, as a failed update can brick your motherboard. Ensure your system is stable during the update process, using a UPS to prevent power interruptions.
Test Individual Components
Testing individual components can help isolate the faulty part. Start by testing RAM sticks, placing them in different slots to identify any faulty modules. Use a known-good power supply to rule out PSU issues. If you have spare components, swap them in to see if the problem persists. This methodical approach can help you pinpoint the exact cause of the red light. Once identified, replace the faulty component to restore functionality.
Check Power Supply
A faulty power supply can cause intermittent issues. Check the PSU for overheating or failure by monitoring the voltage outputs with a multimeter. Ensure the PSU is providing sufficient power for all components. If the PSU is overheating, improve case airflow or consider upgrading to a more efficient model. Faulty PSUs should be replaced with high-quality units from reputable brands. Regularly cleaning the PSU fan and vents can also prevent overheating.
Motherboard’s Manual
Your motherboard’s manual is a valuable resource. Look up specific error codes and their meanings to diagnose the issue accurately. The manual often contains troubleshooting steps and solutions for common problems. Keeping the manual handy can save time and frustration during troubleshooting.
If troubleshooting fails, seek professional help. A qualified technician can diagnose and fix issues that may be beyond your expertise. Sometimes, it’s best to leave complex problems to the professionals.